LiftNXT Training
Help Center
How can we help you?
Google Tag Manager Tracking
This article shows you how to implement Google Tag Manager inside of your site. To learn how to create GA4 tags in Google Tag Manager, see Google's documentation.
Note
Google Analytics 4 is replacing Universal Analytics. On July 1, 2023 all standard Universal Analytics properties will stop processing new hits. 360 Universal Analytics properties will stop processing new hits on July 1, 2024. To learn how to migrate, see Make the switch to Google Analytics 4.
This article does not follow Google’s instructions exactly, but have been tested and work correctly. The instructions have been changed from Google’s instructions for the following reasons:
- Google asks you to install the code in the
<head>of the site. This is a bad practice for page speed because it will slow down the loading of the site. Due to this, we place it at the bottom<body-end>, so it loads last. - Note
- We recommend placing the code in the
<body-end>because while Google Tag Manager does load async, the problem with loading it async is that it will still start downloading resources and executing code. This activity competes with other resources on the phone/computer for bandwidth, processor usage, and more. If you place the code in the<head>, you’re still giving it priority over other resources the browser might want to download, like: styling and layout of the site, core content, images that are above the fold, and more. - Website Builder has consistently found that websites that place the GTM code in the
<head>perform worse than ones that don’t. We’ve optimized our site to prioritize visible content, in line with Core Web Vitals, and the related metrics of FCP and LCP. - It is easier to copy code into a single location.
Add Google Tag Manager
Google will give you code embeds that look like the examples below. Both of these need to be installed into the <body-end>
of the site. To locate the <body-end>
of the site, in the side panel of the editor, click Settings, and then click Head HTML.
Note
The below code is just an example - do not copy this directly into your site. Please be sure to obtain the correct code from Google.
Script Section
<!-- Google Tag Manager -->
<script>(function(w,d,s,l,i){w[l]=w[l]||[];w[l].push({'gtm.start':
new Date().getTime(),event:'gtm.js'});var f=d.getElementsByTagName(s)[0],
j=d.createElement(s),dl=l!='dataLayer'?'&l='+l:'';j.async=true;j.src=
'https://www.googletagmanager.com/gtm.js?id='+i+dl;f.parentNode.insertBefore(j,f);
})(window,document,'script','dataLayer','GTM-XXXX');</script>
<!-- End Google Tag Manager -->
NoScript Section
<!-- Google Tag Manager (noscript) -->
<noscript><iframe src="https://www.googletagmanager.com/ns.html?id=GTM-XXXX"
height="0" width="0" style="display:none;visibility:hidden"></iframe></noscript>
<!-- End Google Tag Manager (noscript) -->
Set Up Google Tag Manager
Warning
This step is critical in allowing Google Tag Manager tracking inside your site.
Next, we need to replace the default All Pages page view trigger with our custom event. Inside of tag manager, we need to first create the custom event trigger:
- Go to Google Tag Manager and sign in.
- On the left, click Triggers.
- On the right side, click the new button.
- Type a name for the trigger at the top left. We recommend something memorable and helpful, such as: Custom Page View Trigger.
- Click the custom trigger configuration box and select Custom Event.
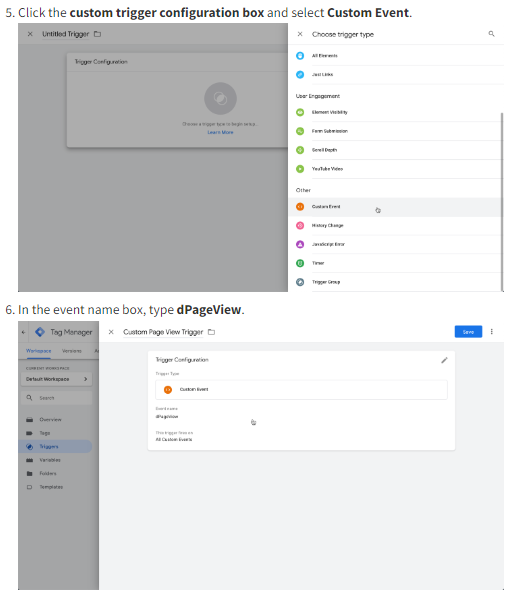
- Click save in Tag Manager.
After creating the trigger, we need to apply it to the tags we want. This needs to be done for every tag you use on the site to trigger for page view events. In this example, we apply it for Google Analytics Universal, however Google Analytics 4 is the newest version we recommend you use. To learn how to create and apply triggers to GA4 tags in Google Tag Manager, see Google's documentation.
- In Tag Manager, go to tags.
- Create a new tag.
- Type a memorable name.
- Click the Tag Configuration box and select the tag you want to use. In this case, Google Analytics Universal.
- After setting up the tag, click the Triggering box. Choose the custom trigger we created Custom Page View Trigger.
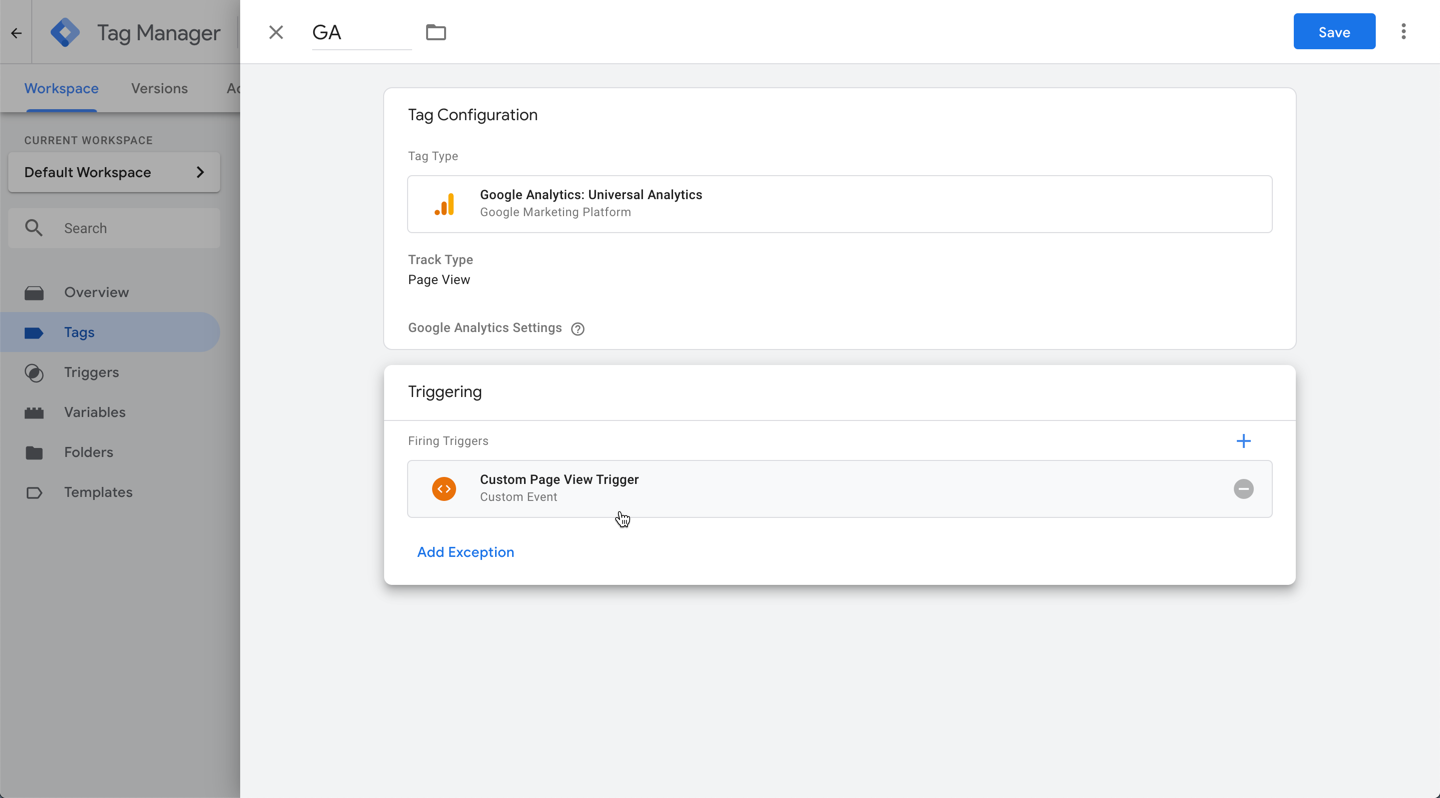
- Note
- If there’s already the All Pages trigger applied, please delete it. We only need the custom trigger to run.
- Select a new variable.
- Select Google Analytics Settings.
- Type your GA tracking ID, and type a name for your variable at the top.
- Select the variable and click Save.
After you have made these changes to Tag Manager, click Submit and then Publish the changes to the live settings.
Considerations for Google Tag Manager
- This code will only run on the live published site. You will want to make sure you test it on the live version.
- We have completed extensive testing and the
body-end.htmlsection of Developer Mode works for adding the noscript code and default code. - Please do not change the ‘dataLayer’ setting from Google Tag Manager, this will break our custom integration code.